
Welcome to our comprehensive guide on how to paint interior doors without brush marks, a skill that not only enhances your home’s aesthetic but also showcases your attention to detail. When it comes to painting interior doors, the material of your door can play a pivotal role in the final outcome. Whether you’re working with wood, metal, or composite materials, understanding their unique characteristics is key to choosing the right painting approach. In this guide, we’ll discuss the optimal paint options, such as enamel, latex, and oil-based paints, each specifically tailored to leave a smooth, mark-free surface. Moreover, the significance of coordinating your colour choice with the room’s wall and surrounding space cannot be overstated, as it profoundly influences the overall ambience of your home. Let’s delve into the essentials of painting interior doors like a pro, ensuring a sophisticated and seamless finish.
Choosing the Best Brushes and Rollers
Selecting the right tools for a seamless and professional-looking paint job on your interior doors is just as important as the painting technique. High-quality brushes and rollers make all the difference to achieve that smooth, brush mark-free finish.
Investing in top-notch brushes and rollers can greatly enhance your interior painting project. They impart a uniform application of paint and last longer and are less likely to shed bristles or fibers onto your freshly painted doors. Using the right tools, you can ensure a perfect finish with minimal effort.
Types of Brushes: Natural vs. Synthetic Bristles
When it comes to brushes, bristles are key. Natural bristle brushes are typically made from animal hair and are best suited for oil-based paints, as they hold paint well and lay it down smoothly. On the other hand, synthetic brushes, usually made from nylon or polyester, are the go-to choice for water-based paints, providing clean and even coverage without the bristles soaking up too much paint and becoming limp.
Roller Nap Lengths for Different Door Textures
The texture of your door should dictate the nap length of your roller. For doors with a flat surface, a shorter nap of about 1/4 inch to 3/8 inch will suffice, ensuring a smooth application without any unwanted texture. For doors with a more pronounced texture, a roller cover with a longer nap, typically 1/2 inch, will help get paint into all the nooks and crannies.
- Smooth doors: Use a foam roller or a roller with a short nap for a finish free of texture.
- Textured doors: Opt for a longer nap roller to get into the grooves and crevices without leaving voids.
Remember, the right tools not only yield a better finish but also make the painting process smoother and faster. Take the time to choose quality brushes and rollers to enhance your painting experience and accomplish that professional, brush mark-free door.
Preparing the Door for Painting: A Step-by-Step Guide
Before you paint your interior doors, proper preparation is critical to ensure a smooth finish without brush marks. This involves cleaning, removing any fixtures, and safeguarding your surrounding area. Here’s how to prepare your door effectively for a flawless paint job.
Cleaning the Door Surface
To guarantee proper paint adhesion and a clean look, thoroughly clean the door surface. Dust, grease, and other contaminants can prevent paint from sticking correctly. Use a gentle, soapy solution and a soft sponge to clean the surface carefully. Rinse with clean water and allow the door to dry completely before proceeding.
Removing Hinges, Knobs, or Hardware
For a more professional appearance and easier painting, remove all door hardware such as hinges, knobs, and locks. This step not only makes it simpler to paint but also helps in avoiding paint on unwanted areas. Store the hardware in a safe place to prevent loss or damage.
Tip: If you choose to leave the hardware on, cover it carefully with painter’s tape to protect it from paint.

Securing the Area
Protect your work area to prevent any paint spills from damaging the wall or flooring. Lay down drop cloths or old newspapers around the door to catch any drips. If you’re painting the door while it’s still attached to the frame, consider using painter’s tape to shield the edges of the wall and door frame for sharp paint lines.
- Use drop cloths or newspapers to cover the floor and any nearby furniture.
- Apply painter’s tape to the wall, floor, and any part of the door frame you are not painting to prevent accidental brush strokes in those areas.
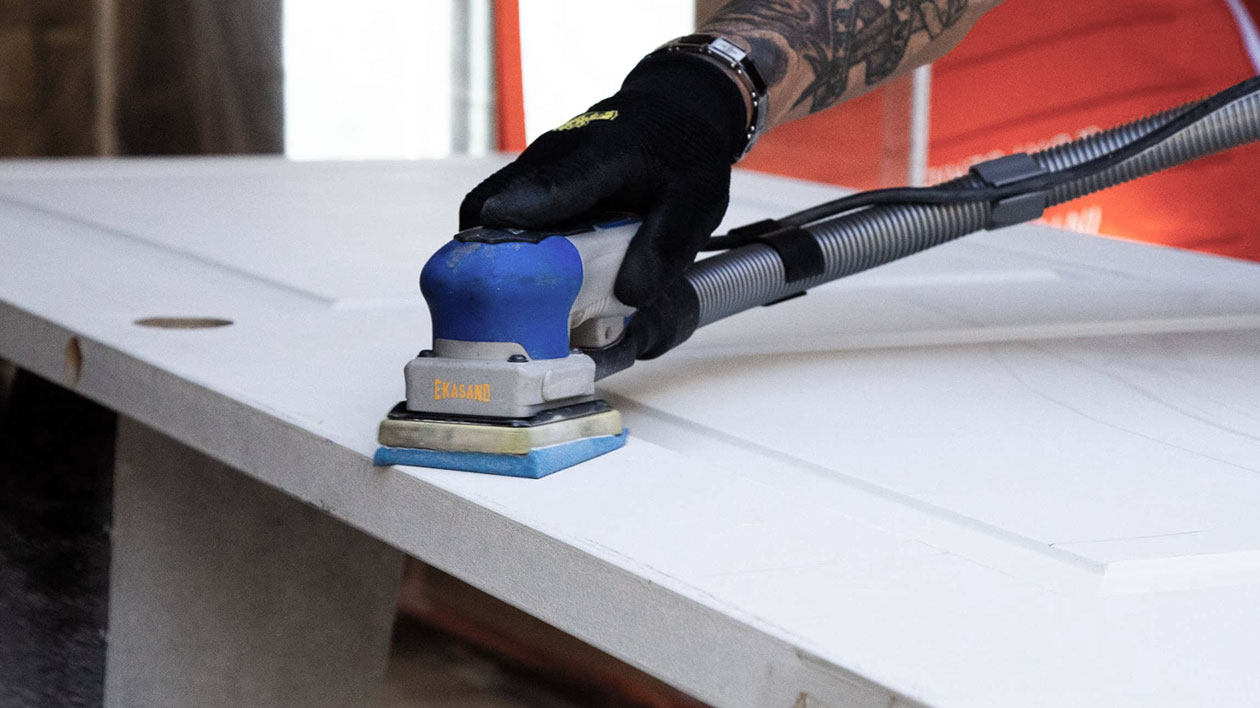
Techniques for Sanding the Door
Sanding is a crucial step in ensuring a smooth and professional finish when painting interior doors. The goal is to create an even surface that allows paint to adhere without brush marks or imperfections. Follow these educational steps to master the art of sanding:
Step-by-Step Guide for Sanding: From Coarse to Fine Grit
Starting with the right sanding technique is essential for a flawless paint job. Here’s how:
- Begin with a coarse grit sandpaper: Start sanding the door with a coarse-grit sandpaper (around 80-100 grit) to remove old paint and any imperfections. Sand in the direction of the wood grain to avoid additional scratches.
- Move to a medium grit: After the rough surface treatment, switch to a medium-grit sandpaper (around 150-180 grit). This helps to further smooth the wood and refine the work done with the coarse grit.
- Finish with a fine grit: Finally, use a fine-grit sandpaper (220-240 grit) to achieve a smooth finish. Fine sanding is the key to creating a high-quality surface that will result in fewer brush marks upon painting.
Dust Removal and the Impact on Final Paint Application
Once you’ve completed the sanding process, removing all dust particles is imperative for a pristine paint job:
- Wipe down with a damp cloth: Use a damp cloth to wipe away the majority of the dust. This avoids dust from becoming airborne and resettling on the door.
- Use a tack cloth: After the surface is dry, use a tack cloth to remove any remaining fine dust. A tack cloth is slightly sticky and picks up dust that regular cloths can miss.
- Understand the impact: Any residual dust can result in a gritty texture and visible imperfections once the paint is applied. Ensuring complete dust removal contributes to a smooth, professional finish.
By meticulously following these techniques for sanding the door, you’re setting the stage for a seamless and successful paint application, free of unwanted brush marks. Remember, preparation is just as important as the painting itself.
Applying Primer Correctly: The Foundation for a Flawless Finish
Priming your interior doors is a crucial step in achieving a smooth, brush mark-free finish. Understanding how to apply primer correctly can make the difference between an amateur and professional-looking result.
Primers are designed to create a uniform surface for the paint to adhere to, which can significantly enhance the durability and appearance of your paint job. A good primer will help in filling in minor surface imperfections, providing a smooth base that helps prevent brush marks.
Brush and Roller Techniques for an Even Primer Coat
When applying primer:
- Start with a high-quality brush or roller specifically designed for the purpose of priming.
- Apply the primer in thin, even coats. Avoid overloading the brush or roller to prevent drips and uneven application.
- Use long, unidirectional strokes with the brush for the edges and detail work.
- For larger, flat areas, use a roller, moving in a ‘W’ pattern to spread the primer evenly before smoothing it out with straight, controlled strokes.
Drying Times Before the Next Step
After applying the primer:
- Allow it to dry thoroughly according to the manufacturer’s instructions before applying the paint. Depending on the product and environmental conditions, this may take anywhere from a few hours to overnight.
- Check the primer for any imperfections or uneven spots, and lightly sand if necessary before beginning your paint application.
Remember: Rushing through the drying process can lead to a less-than-ideal finish and may cause the paint not to adhere properly, increasing the likelihood of brush marks. Patience during this stage lays the groundwork for a professional-quality job.
Instructions for Applying Paint Without Leaving Brush Marks
Follow this comprehensive painting guide for a flawless and professional-looking finish on your interior doors. A careful approach can prevent the frustration of brush marks and give your door the desired smooth finish. Here’s how to achieve it:
- Begin by dipping your brush lightly into the paint, ensuring not to overload it.
- Apply the paint with confident yet controlled strokes.
- Always maintain a wet edge by starting from a previously painted section and blending the new strokes. This technique avoids overlaps that can lead to brush marks.
- Additionally, aim for a thin coat rather than a thick one, as multiple thin layers yield a smoother finish than one heavy layer.
An effective way to ensure even coverage without brush marks is to employ the “W” or “V” painting technique. Start by painting a large “W” or “V” pattern on the door, then fill in the pattern without lifting your brush. This helps distribute the paint evenly and works particularly well when using a roller.
Lay Off Technique: How to Smooth Out the Paint After Application
Once you have applied paint to a section of the door, use the lay off technique to smooth it out. Gently drag a clean, dry brush or roller over the wet painted surface in one long stroke. This should be done from top to bottom to remove any excess paint and eliminate brush marks. Having a light touch is important—the brush or roller should barely touch the surface.
- Tip 1: For the best results, use a high-density foam roller to apply paint on flat surfaces and a high-quality synthetic brush for the corners and edges.
- Tip 2: Maintain a consistent direction with your strokes—this not only helps with a uniform look but also prevents the formation of brush marks.
Tips for Avoiding Drips and Streaks When Painting Interior Doors
For a flawless finish on your freshly painted interior doors, it’s crucial to prevent drips and streaks. Follow these tips to ensure a smooth, professional-looking result that showcases your hard work.
Paint Consistency and Brush Loading
To avoid drips, getting the paint consistency right is key. If necessary, thin the paint slightly according to the manufacturer’s instructions. When loading your brush, dip half the length of the bristles into the paint, tapping off any excess to prevent drips before applying the paint to the door.
Correct Pace and Pressure for Brush Strokes
Maintaining the right pace and applying consistent pressure can promote an even application. Work with swift, smooth strokes to spread the paint evenly. Avoid pressing too hard, as this can cause bristle marks and excess paint that creates drips and streaks.
Environmental Conditions and Paint Application
Environmental factors such as temperature and humidity significantly influence how your paint dries and settles. Aim for a well-ventilated environment at around 50-70°F with a relative humidity below 50% to achieve the best results, minimizing the risks of drips and streaks due to uneven drying.
- Avoid painting on excessively humid days to prevent slow drying and sagging paint.
- Ensure good ventilation to help the paint dry evenly and quickly.
- Be aware of airflow from air conditioning or fans that can cause uneven drying。
Drying Times and Conditions
Ensuring your freshly painted interior doors are immaculate comes down to proper drying times and conditions. How paint dries can significantly impact the result, making the difference between a smooth, professional finish and one marred by imperfections.
Ideal Conditions for Drying to Avoid Imperfections
Temperature and humidity play crucial roles in achieving brush mark-free doors. Aim to paint in an environment with a consistent temperature, preferably between 10°C and 22°C, and low humidity. Excessive moisture in the air can prolong drying times and cause paint to sag, increasing the likelihood of brush marks.
Ventilation is another key factor. Ensure the room is well-ventilated to facilitate even drying. However, avoid direct air flow on the surface, as it can cause the paint to dry too quickly, locking in unwanted streaks and marks.
Time Management Between Coats for the Best Result
Patience is essential; wait for the first coat to dry completely before applying the second. Rushing this process can lead to stickiness and marks as the layers blend imperfectly. Consult the paint manufacturer’s recommendations for drying times, typically around 4 to 6 hours, but remember these can vary based on the abovementioned conditions.
- Touch the edge of the door to test dryness—it should feel firm, not tacky.
- If using latex paint, a second coat can often be applied sooner than with oil-based paints.
- Timing your second coat for the cooler part of the day can prevent the paint from drying too fast.
By maintaining these conditions and managing drying times, your interior doors will have a flawless, professional-looking finish free from brush marks.
Adding a Finish Coat for Durability
After ensuring your interior door is painted beautifully and free of brush marks, the final step is to add a finish coat that enhances the appearance and provides the durability needed for a high-traffic item. This is especially important for interior doors, as they are subject to constant use and occasional knocks and bumps.
Selecting the Right Finish
Selecting the right type of finish for your door can greatly impact its longevity and ease of maintenance. Here are the most common finishes:
- Matte: Offers a non-reflective surface that is good for hiding imperfections but can be less durable.
- Glossy: Highly durable and easy to clean, perfect for frequently used doors.
- Satin: A happy medium between matte and glossy, satin finish provides some sheen and maintains cleanability while not highlighting imperfections as much as a glossy finish.
Choose a finish that complements the aesthetics of your home and works with the level of traffic your door will encounter.
Application Tips to Ensure a Durable, Mark-Free Surface
To apply the finish coat effectively:
- Sand the door lightly with fine-grit sandpaper after the last paint coat to guarantee a smooth base for the finish.
- Wipe down the door with a tack cloth to remove any dust.
- Apply the finish coat with a high-quality brush or roller, using the same technique used to apply the paint. Smooth, consistent strokes will help prevent new brush marks.
- If using a brush, opt for one with synthetic bristles to ensure a smooth application with modern water-based finishes.
- Consider using a water-based polyurethane finish for easy cleanup and less odor, while still providing a durable surface.
By adding a finish coat, you not only enhance your door’s resistance to wear and tear but also ensure its finish stays looking fresh and new for years to come. Remember, the key to a durable and mark-free door is as much in the application as it is in the choice of finish.