
Stripping paint from the exterior of a house can seem like a daunting task, yet it’s a critical step in the preparation for a fresh coat. Understanding the breadth of the project, the surface you are working with, and framing a realistic timeline are essential components to success. Whether you’re tackling a small section or an entire house facade, this guide will help you evaluate the size of the paint removal area to determine an efficient method. Identifying the type of substrate be it wood, stucco, or vinyl is not only pivotal for the choice of technique but also the longevity of your new paint job. Establishing a detailed project timeline ensures the endeavour progresses smoothly without unforeseen disruptions. Dive in as we delineate professional strategies to systematically remove exterior house paint, setting you up for a pristine and enduring finish.
Safety Precautions and Equipment
Ensuring safety is paramount when undertaking a project like how to remove exterior house paint. Before starting, it’s crucial to equip yourself with the right safety measures to avoid any hazards. Here’s a guide to keeping safe and preparing your workspace.
Personal Protective Equipment (PPE) for Safety
Personal Protective Equipment is your first line of defence against potential risks. It’s essential to gear up with:
- Safety glasses or goggles to protect your eyes from paint particles and debris.
- Respiratory protection, such as a dust mask or respirator, especially if you’re working with chemical strippers or sanding paint.
- Heavy-duty gloves to prevent skin irritation and provide a better grip on your tools.
- Protective clothing, including long sleeves and pants, to shield your skin.
- Hard hat or helmet if you’re working under areas where debris may fall.
- Ear protection in the form of earplugs or earmuffs when using loud power tools.
Setting Up the Work Area for Safety and Efficiency
Organising your work area can significantly reduce the risk of accidents. Take these steps:
- Cordon off the area to ensure that no unauthorized persons, especially children and pets, can access the site.
- Place signage indicating work in progress to alert passersby.
- Remove any obstacles and secure loose objects to create a clear work space.
- Ensure you have easy access to your tools and equipment to prevent unnecessary movement during work.
Proper Ventilation When Working with Chemicals or Heat
Lastly, when using chemical paint strippers or heat guns, adequate ventilation is essential to prevent the buildup of fumes:
- Work outdoors whenever possible.
- If you must work indoors, open all windows and doors to allow fresh air circulation.
- Use fans to keep air moving, directing fumes away from your work area and out of any openings.
Explore the Different Types of Exterior Paint Removal Methods
When it comes to removing paint from the exterior of a house, there is no one-size-fits-all solution. The approach you choose will depend on several factors, including the type of surface beneath the paint, the paint’s age and condition, and your individual project needs. Below, we explore various methods and tools available for effective paint removal.
Manual and power tools are the two primary categories of tools used for paint removal from exterior surfaces. Here’s a quick comparison:
- Manual Tools: Include scrapers, sandpaper, and wire brushes. These tools are perfect for small areas or delicate surfaces where precision is crucial. They are also cost-effective and don’t require a power source.
- Power Tools: Comprise electric sanders, power washers, and paint strippers. These are suited for larger projects where speed and efficiency are priorities. Power tools can save time but require caution to avoid damaging the underlying surface.
Selecting the right method is critical for achieving the desired results while maintaining the integrity of your home’s exterior. Here are the contexts in which each method shines:
- Manual Tools: Ideal for projects that require meticulous attention to detail or are situated in confined spaces where power tools are impractical.
- Power Tools: Best when tackling extensive areas or multiple layers of paint, as they can significantly speed up the process. However, they demand experience and control to prevent damage.
Mastering Chemical Paint Strippers for Exterior Paint Removal
When it comes to removing paint from exterior surfaces, chemical paint strippers can be incredibly effective. They provide a solution that, when used correctly, minimises labour-intensive scraping and sanding. However, their efficacy comes with necessary safety precautions due to their chemical composition. Here’s how to utilise them safely and efficiently.
Chemical paint strippers are designed to break down the bonds between the paint and the substrate, whether it’s wood, metal, or masonry. They typically come in gel or paste forms, adhering to vertical surfaces to prevent drips and ensure consistent coverage.
Safety Considerations When Using Chemicals
- Always use chemical strippers in a well-ventilated area to prevent inhalation of fumes.
- Wear protective gear, such as gloves, goggles, and a respirator, to safeguard your skin, eyes, and lungs.
- Keep children and pets away from the work area. Chemical strippers can be toxic and pose serious health risks if ingested or if they come into contact with skin.
Application Techniques for Effective Results
For the best results when using chemical paint strippers, follow these application techniques:
- Ensure that the surface is clean and dry before applying the stripper.
- Apply a thick coat of the chemical stripper with a paintbrush or a specialized applicator.
- Let the stripper sit for the time recommended by the manufacturer to allow it to penetrate and lift the paint.
- After the recommended time, use a paint scraper to gently remove the bubbled paint. Be careful not to gouge the underlying surface.
- Once all the paint has been removed, clean the surface with a mild detergent and water to neutralize any chemical residue.
- Allow the surface to dry completely before repainting or applying any new finishes.
Master the Heat Gun Method for Removing Exterior House Paint
When it’s time to strip old paint from your house’s exterior, a heat gun can be an effective method to get the job done. This approach is suitable for larger surfaces and can help to significantly speed up the process when compared to manual scraping alone. Below we walk you through when to use a heat gun and provide a professional step-by-step guide to executing this technique safely and efficiently.
When to Use a Heat Gun
Choosing a heat gun as your paint removal method is ideal when you’re dealing with multiple layers of paint or when the paint is too stubborn for simpler scraping methods. Heat guns work best on wood and metal surfaces but should be used with caution on delicate materials that may warp or burn under high heat.
Step-by-Step Guide for the Heat Gun Technique
Removing paint with a heat gun requires patience and attention to detail. Here’s how to tackle the job like a pro:
- Set Up Your Work Area: Clear the space of any flammable materials and ensure good ventilation throughout the process.
- Choose the Right Heat Gun: Use a heat gun designed for paint removal, one that allows you to control temperature settings.
- Start with a Test Patch: Test the heat gun on a small, inconspicuous area to determine the right heat setting and confirm the substrate can handle the heat without damage.
- Apply Heat Evenly: Hold the heat gun 6 to 8 inches away from the surface, moving it steadily to avoid scorching the wood or causing the paint to bubble excessively.
- Scrape the Paint: As the paint softens, use a paint scraper to gently remove the loosened paint, taking care not to gouge the surface.
- Progress in Sections: Work on small sections at a time, pointing the heat gun away from the scraped area to avoid overheating.
- Cool Down: After finishing a section, allow the area to cool completely before touching it or moving on to further prep work for repainting.
Safety Tips to Prevent Damage and Harm
Using a heat gun for paint removal comes with inherent risks. Here’s how to minimize these risks for a safe and effective paint removal experience:
- Wear Protective Gear: Use heavy-duty gloves, goggles, and a respirator mask to protect against fumes and accidental burns.
- Keep a Fire Extinguisher Handy: Always have a fire extinguisher nearby in case the high heat ignites any nearby materials.
- Never Overheat One Spot: Constantly move the heat gun to prevent concentrating heat in one spot, which can cause irreparable damage to the substrate.
- Monitor for Lead Paint: If your home was built before 1978, there’s a chance it could have lead-based paint, which requires special handling and disposal.
- Stay Alert: Never leave the heat gun unattended while it is powered on and maintain focus to prevent accidents.
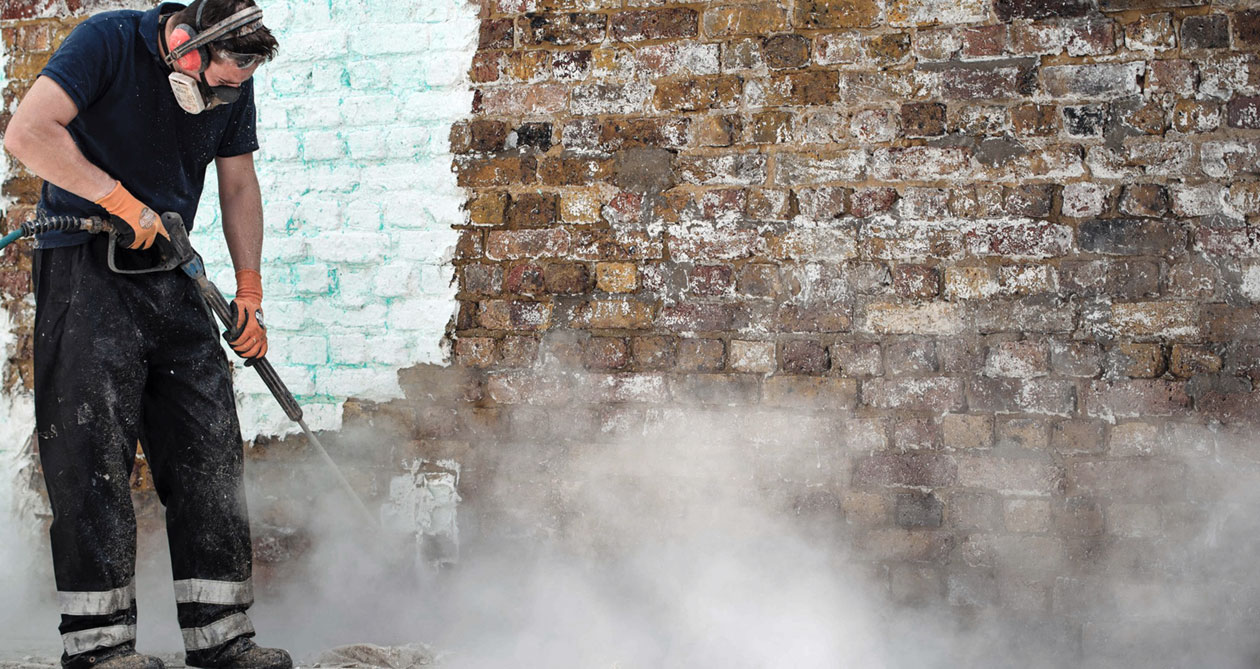
Pressure Washing Technique: A Safe and Efficient Method to Remove Exterior Paint
When it comes to removing paint from exterior surfaces, pressure washing can be a highly effective method, particularly for large areas where other techniques may be too time-consuming. However, it’s crucial to use the right pressure settings and techniques to avoid damaging the materials beneath the paint.
Appropriate Pressure Settings for Different Exterior Surfaces
Choosing the correct pressure settings is essential when using a pressure washer. Here’s a quick guide:
- Wood siding: Use a lower pressure setting (around 500-600 psi) to prevent the wood from being etched or damaged.
- Vinyl siding: Typically, a medium pressure setting (1,000 to 1,300 psi) is suitable for vinyl surfaces.
- Concrete and brick: These surfaces can handle higher pressure (about 2,500 to 3,000 psi) but always start lower to gauge the effect.
How to Use Pressure Washing Effectively Without Damaging Wood or Other Materials
Even with the right pressure settings, the technique is everything. Follow these best practices to clean effectively:
- Begin with the pressure washer on a lower setting and gradually increase pressure as needed.
- Maintain a consistent distance between the nozzle and the surface-usually 12 to 18 inches to avoid concentrated blasts that could cause damage.
- Use a sweeping motion, much like painting with a brush, which helps to evenly distribute the water pressure and prevent gouging.
- Use a fan tip nozzle rather than a pinpoint nozzle to disperse the water pressure over a wider area.
- Test the technique on a small, inconspicuous area before tackling the larger surface.
- Keep the nozzle moving at all times. Staying in one spot too long can cause damage, especially on softer surfaces like wood.
Sanding: The Key to Smooth Paint Removal
Sanding is a critical step in the process of removing exterior house paint, whether you’re prepping for a new coat or restoring the original surface. By understanding when to use manual sanding versus power tools, you can ensure that the job is done efficiently and with the best possible finish.
Manual sanding is often preferred for smaller projects or when working on delicate surfaces where precision is paramount. It allows for a gentle approach, reducing the risk of damaging the substrate. Conversely, power tools are suited for larger areas where removing layers of paint quickly is the priority. They save time and labour but require careful handling to avoid gouging the wood or other materials beneath the paint.
Choosing the appropriate sandpaper grit is essential for effective paint removal. Start with a coarser grit to remove the bulk of the paint and then transition to finer grits to smooth the surface. Grits typically range from 40 (very coarse) to 320 (very fine), with 80 to 120 being the most effective range for the initial stages of paint removal.
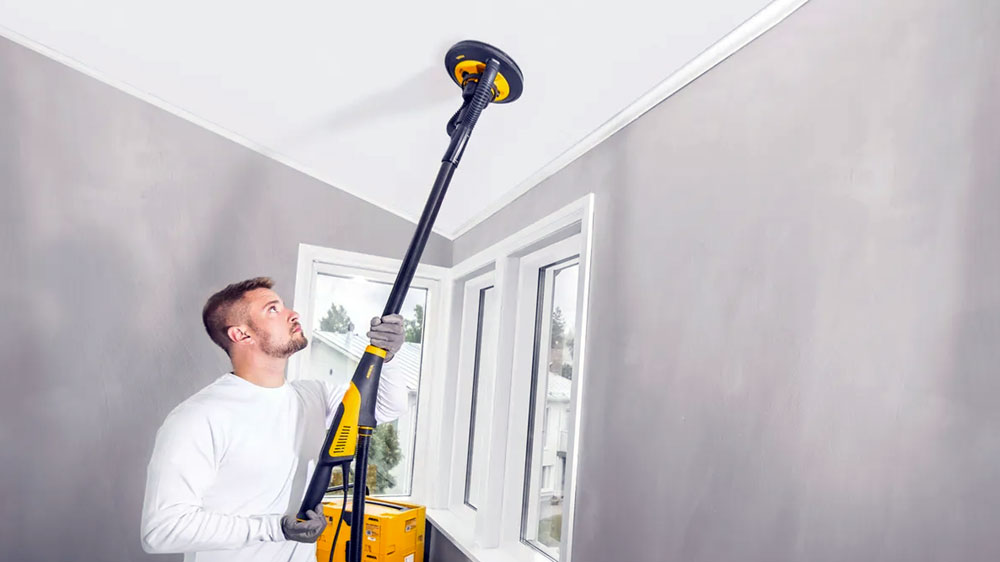
Techniques for Sanding Large Areas or Intricate Details
When sanding large flat areas, it’s beneficial to use a power sander in straight, controlled motions to ensure an even finish. For intricate details or hard-to-reach spots, manual sanding with a smaller tool like a sanding block or sponge can achieve the precision needed without over-sanding. Always sand with the grain of the wood to prevent scratches and be sure to check your progress regularly to avoid removing too much material.
- For large surfaces: Utilise an orbital or belt sander to maintain consistency.
- For corners and crevices: Employ a detail sander or hand-sanding with specialized tools tailored for these areas.
- Safety reminder: When using power tools, always adhere to safety guidelines and wear appropriate personal protective equipment.
Mastering Scraping Techniques for Effective Paint Removal
Removing exterior house paint effectively often involves a vital technique-scraping. Scrutinizing the tools and approaches best suited for different types of paint and surfaces ensures a smooth and clean outcome. Below, explore the most professional scraping methods ready for any DIY enthusiast or seasoned contractor.
The Right Tools for Scraping Paint
Before starting your scraping project, selecting the appropriate tools is crucial. Ideally, you will have a variety of scrapers at your disposal, including:
- Stiff putty knives for precise paint removal in smaller areas.
- Paint scrapers with interchangeable blades to adjust for different tasks.
- Carbide scrapers, are more durable and easier on harder surfaces.
- Wire brushes to remove loose paint after scraping.
- Contour scrapers that can adjust to the profile of the surface.
All these tools should be used with care to avoid damaging the substrate beneath the paint. Remember, sharp blades are safer and more effective, so ensure that your scraping tools are well-maintained and replaced when necessary.
The Best Approach for Different Types of Paint and Surfaces
Not all paint or surfaces are created equal, and the scraping technique should correspond to what you’re working with:
- For oil-based paints on wood, use a stiff putty knife or carbide scraper with controlled pressure to avoid gouging the wood.
- On plaster or stucco surfaces, opt for a paint scraper that conforms to the curvature of the walls, being careful not to apply too much force to prevent damage.
- With peeling or flaking paint, a wire brush in conjunction with a scraper can be used to remove loose edges before a full-on scrape-down.
- On metal surfaces, such as window frames, a steel brush prime for detailed work may prove beneficial before flat scrapers eliminate the remainder.
Bear in mind that patience and attention to detail are paramount in scraping techniques. Taking shortcuts can harm your surfaces and make for a more labour-intensive paint application later.
Here is an expert quote from Maz Nassimi, a professional painter at Dupaint: “Beware the hidden enemy! Trapped moisture beneath peeling paint can silently eat away your stonework, leaving it fragile and crumbling. Simply removing the paint won’t undo the damage – it could expose a porous, powdery mess. Before you tackle the paint, consult with experts like the exterior painting team at Dupaint to assess the health of your stone and plan a restoration that saves both the beauty and integrity of your home.”
Environmental Considerations and Disposal in Paint Removal
Removing exterior house paint is more than just a cosmetic update; it’s a responsibility towards the environment as well. As you strip away the old layers, be mindful of the impact your actions may have. Here are some vital steps to keep your project environmentally friendly and ensure that the waste is managed correctly.
When removing paint, consider using the most environmentally friendly methods available. Opt for strippers with fewer volatile organic compounds (VOCs), and whenever possible, choose manual methods like scraping or sanding to eliminate the application of chemicals altogether. Using a heat gun can also be an eco-friendlier solution if used correctly and safely.
Proper Disposal of Paint Waste
- Paint Flakes: Collect paint flakes diligently. Large chunks can be bagged and disposed of as solid waste following your local regulations. Remember that lead-based paint, which may be present in older homes, requires special handling as hazardous waste.
- Chemical Strippers: Leftover chemical strippers must never be poured down the drain or left out on the ground. They can contaminate water sources and soil. Check your local waste disposal guidelines to know how to properly dispose of these materials.
Within Australia, you can use the Paintback program to dispose of unwanted paint. Paintback is an industry-led initiative that collects and responsibly disposes of unwanted architectural and decorative (A&D) paint and packaging across 165 locations in Australia.
Recycling and Reusing Materials
In eco-conscious paint removal, always look for opportunities to recycle or reuse materials. Drop cloths, scrapers, and other non-disposable tools should be cleaned and kept for future projects. Also, if any of the paint removed is still in liquid form, consider donating it if it’s in sufficient condition, or take it to a recycling facility that accepts such materials.
By keeping these key environmental considerations in dialogue with your paint removal project, you’ll contribute to a greener, cleaner world. Also, ensure to follow local regulations concerning the disposal of hazardous waste. This not only protects the environment but also shields you from potential fines and legal issues.